Okay, here’s a blog-style introduction about Sylvanian Families photography tips:Capturing the charm of Sylvanian Families through photography is more than just snapping a picture; it’s about weaving stories and bringing these tiny, adorable creatures to life.
I’ve always loved how these miniature figures evoke a sense of nostalgia and wonder, and photographing them has become a passion. But getting that perfect shot, the one that truly captures their essence, takes a little more than just pointing and shooting.
From setting up the scene to mastering the lighting, there are so many little details that can elevate your Sylvanian photography from cute to captivating.
I’ve experimented with different techniques, and I’m excited to share what I’ve learned. Let’s delve into the world of miniature photography and create some heartwarming memories together.
Let’s explore it in detail below!
Crafting the Perfect Miniature World: Scene Setting Tips

1. Location, Location, Location: Finding the Ideal Spot
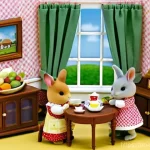
Okay, so finding the right spot is honestly half the battle. I’ve learned that you can’t just plop your Sylvanian Families down anywhere and expect magic to happen. Think about what kind of story you want to tell. Is it a cozy home scene? A bustling outdoor market? A serene picnic in the park? For indoor shots, I love using window sills because the natural light is just unbeatable. I also rearrange my furniture to create a little ‘mini-set’ that complements the figures. Outdoors, local parks are goldmines. Just be mindful of the scale – a giant oak tree might look a little out of place next to a tiny Sylvanian!
2. The Devil’s in the Details: Props and Accessories
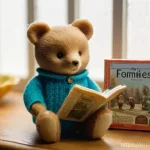
Props are EVERYTHING! Seriously, they can make or break your photo. I’ve spent way too much time scavenging for the perfect miniature accessories. Thrift stores and craft shops are your best friends. Think about adding tiny books, miniature food (polymer clay is your friend!), or even little fabric scraps for blankets. The key is to make the scene look lived-in and believable. For example, if you’re doing a school scene, add tiny pencils and notebooks. If it’s a kitchen, little pots and pans are a must. These small details add depth and realism, making your photos so much more engaging.
3. Tell a Story: Arranging Your Figures
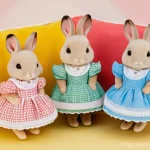
Don’t just line up your Sylvanian Families like they’re waiting for the bus! Think about the story you want to tell and arrange them accordingly. Are they having a conversation? Are they playing a game? Are they simply enjoying a quiet moment together? Pay attention to their poses and facial expressions (even though they’re limited, you can still create a sense of emotion). I often use small bits of wire or Blu-Tack to help pose them just right. Remember, it’s all about creating a narrative that draws the viewer in.
Lighting is Everything: Mastering Natural and Artificial Light
1. Chasing the Golden Hour: Why Natural Light Rules
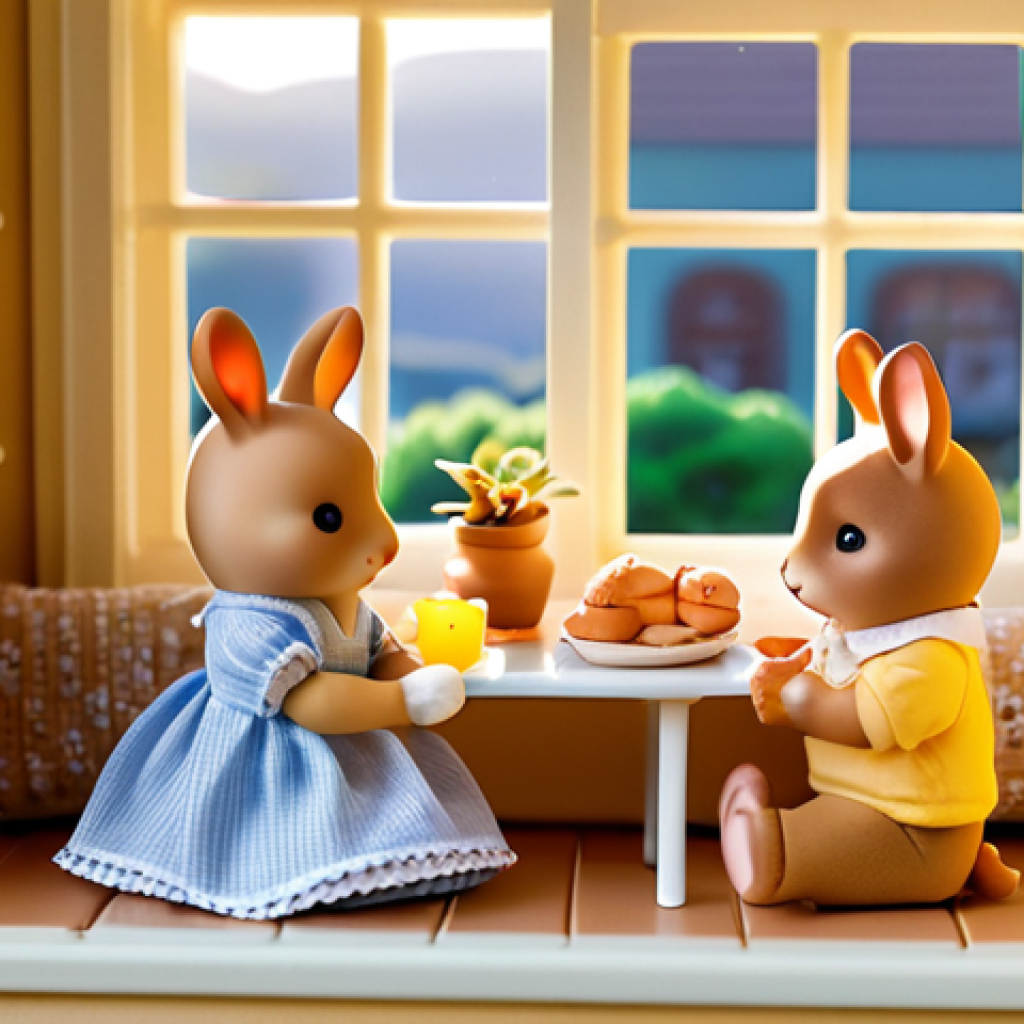
Oh man, natural light is a photographer’s best friend, especially for these tiny scenes. I’ve found that the golden hour – that magical time just after sunrise and just before sunset – gives the most beautiful, soft light. It makes everything look warm and inviting. Avoid harsh midday sun, which can create hard shadows and wash out the colors. If you’re shooting indoors, position your scene near a window and use a white reflector (a piece of white cardboard works great) to bounce light back into the shadows. Trust me, it makes a world of difference.
2. When the Sun Goes Down: Working with Artificial Light
Sometimes, you just can’t rely on natural light, especially if you’re shooting indoors or during the evening. That’s where artificial light comes in. I use a small LED panel light with adjustable brightness and color temperature. Experiment with different angles and distances to find the most flattering light. Avoid using your camera’s built-in flash, as it tends to create harsh, unflattering light. Softboxes or diffusers can help soften the light and reduce shadows. It takes a little practice, but mastering artificial light will open up a whole new world of possibilities for your Sylvanian photography.
3. Playing with Shadows: Adding Depth and Dimension
Don’t be afraid of shadows! They can add depth and dimension to your photos, making them look more interesting. Experiment with different light angles to see how shadows fall on your scene. Backlighting, where the light source is behind your subject, can create a beautiful silhouette effect. Side lighting can accentuate textures and details. The key is to find a balance between light and shadow that enhances the overall mood and atmosphere of your photo. I’ve found that sometimes, a little bit of shadow can be just as important as the light itself.
Angles and Perspectives: Finding the Perfect Viewpoint
1. Get Down Low: Shooting from a Miniature Perspective
This is a game-changer! Instead of shooting down at your Sylvanian Families from above, get down on their level. Crouch down, kneel, or even lie on the floor to get a true miniature perspective. This will make your figures look larger and more imposing, and it will draw the viewer into their world. It’s like you’re right there with them, experiencing their adventures firsthand. Trust me, it’s worth the effort to get down low – the results are amazing.
2. Rule of Thirds: Composing a Balanced Shot
The rule of thirds is a classic photography guideline that can really elevate your compositions. Imagine dividing your frame into nine equal parts with two horizontal and two vertical lines. Place your key subjects along these lines or at the points where they intersect. This creates a more balanced and visually appealing composition. For example, you could place a Sylvanian figure at one of the intersecting points, or align a horizon line with one of the horizontal lines. It takes a little practice to get the hang of, but it’s a powerful tool for creating compelling images.
3. Leading Lines: Guiding the Viewer’s Eye
Leading lines are another great way to improve your compositions. Use lines – real or implied – to guide the viewer’s eye through the scene. A path, a fence, or even a row of trees can serve as leading lines. Start the line at the edge of the frame and lead it towards your subject. This creates a sense of depth and draws the viewer deeper into the photo. I often use leading lines to create a sense of perspective and to emphasize the scale of the miniature world.
Adding a Touch of Magic: Post-Processing Tips
1. Basic Adjustments: Brightness, Contrast, and Color
Even the best photos can benefit from a little post-processing. I use Adobe Lightroom or Photoshop for my editing, but there are plenty of free apps available that can do the job just as well. Start with basic adjustments like brightness, contrast, and color saturation. Adjust the brightness to make the photo look brighter and more inviting. Increase the contrast to add more depth and dimension. Adjust the color saturation to make the colors pop. Be careful not to overdo it – the goal is to enhance the photo, not to make it look artificial.
2. Sharpening and Noise Reduction: Fine-Tuning the Details
Sharpening can help bring out the details in your photos, making them look crisper and more defined. However, too much sharpening can create unwanted artifacts. Use it sparingly and focus on the areas that need it most. Noise reduction can help reduce graininess, especially in photos taken in low light. Again, use it sparingly, as too much noise reduction can make your photos look blurry. The key is to find a balance that enhances the overall quality of the image without sacrificing detail.
3. Creative Effects: Adding a Personal Touch
Once you’ve made the basic adjustments, you can start experimenting with creative effects. Try adding a vignette to draw the viewer’s eye towards the center of the frame. Use filters to create a specific mood or atmosphere. Experiment with different color grading techniques to give your photos a unique look. The possibilities are endless! Just remember to have fun and let your creativity shine. After all, photography is about expressing yourself and sharing your vision with the world.
Essential Gear for Sylvanian Families Photography
| Gear | Description | Why It’s Useful | Recommended Brands/Models |
|---|---|---|---|
| Camera | A DSLR, mirrorless camera, or even a smartphone with a good camera. | Provides high-quality images and manual control over settings. | Canon EOS, Sony Alpha, iPhone, Samsung Galaxy |
| Lens | A macro lens or a lens with good close-up capabilities. | Allows you to capture fine details of the miniature figures. | Canon EF 100mm f/2.8 Macro, Sony FE 90mm f/2.8 Macro |
| Tripod | A sturdy tripod to keep your camera steady. | Prevents blurry images, especially in low light. | Manfrotto, Vanguard, Joby |
| Lighting | LED panel light or a desk lamp with adjustable brightness. | Provides consistent and controllable light for indoor shots. | Neewer LED Panel, OttLite |
| Reflector | A white reflector or a piece of white cardboard. | Bounces light back into shadows, creating a more balanced exposure. | 5-in-1 Reflector, White Foam Board |
| Props | Miniature accessories, fabrics, and other small items. | Adds depth, realism, and storytelling to your scenes. | Etsy, Miniature Sweet, Local Craft Stores |
Building a Community: Sharing Your Sylvanian Creations
1. Instagram Magic: Using Hashtags to Connect
Instagram is where the Sylvanian magic happens! Seriously, it’s the best place to share your photos and connect with other enthusiasts. The key is to use relevant hashtags. I’ve found that hashtags like #sylvanianfamilies, #sylvanianfamiliesphotography, #calicocritters, #miniaturephotography, and #toyphotography are super effective. Also, don’t be afraid to use more specific hashtags related to the theme of your photo. For example, if you’re shooting a Christmas scene, use #sylvanianfamilieschristmas. Engaging with other people’s posts is also crucial – like, comment, and follow accounts that inspire you. It’s all about building a community!
2. Facebook Groups: Joining the Conversation
Facebook groups are another great way to connect with Sylvanian fans. There are tons of groups dedicated to Sylvanian Families photography, collecting, and customizing. Join a few groups and start sharing your photos. Provide constructive feedback on other people’s photos and ask for feedback on your own. Participating in discussions and sharing tips can help you learn new techniques and improve your skills. Plus, it’s a great way to make new friends who share your passion.
3. Beyond Social Media: Local Clubs and Events
Don’t limit yourself to online communities! Look for local Sylvanian Families clubs or events in your area. These events are a great way to meet people in person, see other people’s collections, and even participate in photography contests. You can also organize your own meetups or workshops. It’s all about sharing your love for Sylvanian Families and connecting with like-minded individuals. Who knows, you might even inspire someone else to start their own Sylvanian photography journey!
Wrapping Up
So, there you have it! A deep dive into capturing the charm of Sylvanian Families through photography. Remember, it’s all about practice, experimentation, and letting your creativity shine. Don’t be afraid to try new things and develop your own unique style. Happy shooting, and I can’t wait to see your miniature masterpieces!
Handy Tips & Tricks
1. Use a small brush to clean dust and debris from your miniature scenes.
2. Invest in a good quality macro lens for capturing intricate details.
3. Experiment with different backgrounds to create various moods and atmospheres.
4. Create a Pinterest board to gather inspiration for your Sylvanian Families photography.
5. Join online forums to share your work and get feedback from other photographers.
Key Takeaways
– Location and props are essential for setting the scene.
– Natural light is ideal, but artificial light can be mastered with practice.
– Shoot from a low angle to create a miniature perspective.
– Use the rule of thirds and leading lines to improve your compositions.
– Post-processing can enhance your photos, but don’t overdo it.
– Engage with the Sylvanian Families community on social media.
Frequently Asked Questions (FAQ) 📖
Q: What’s the easiest way to make my Sylvanian Families photos look more professional?
A: Honestly, it’s all about the lighting and the background! Forget about using your camera’s flash – it usually washes everything out and makes the shadows harsh.
Instead, try shooting near a window during the “golden hour” (that’s the hour after sunrise or before sunset) for soft, warm light. For backgrounds, I’ve found that simple is best.
A plain piece of cardboard covered in felt, or even just a clean, uncluttered area of your desk can work wonders. I even used a section of my daughter’s old dollhouse once!
The key is to keep the background simple so it doesn’t distract from your adorable Sylvanian subjects.
Q: I’m struggling to come up with creative ideas for my Sylvanian Families photography.
A: ny tips? A2: Oh, I totally get that! Sometimes the creative well runs dry.
What I’ve found helpful is to think about little stories or scenarios. Imagine what your Sylvanian Families might be doing in their everyday lives. Are they having a picnic?
Are they gardening? Maybe they’re putting on a puppet show? Once you have a story in mind, it’s easier to pose them and create a scene.
Also, don’t be afraid to use props! Little teacups, miniature books, even twigs and leaves from your garden can add a lot of personality to your photos.
I remember using my niece’s bead collection as “berries” for a foraging scene, and it turned out so cute!
Q: My photos are always blurry, even when I think I’m holding the camera steady. What am I doing wrong?
A: Blurry photos are the bane of every photographer’s existence, right? With miniatures, it can be even trickier! Since you’re working with such small subjects, even a tiny bit of camera shake can make your pictures look soft.
The best solution is to use a tripod. Even a small, inexpensive tabletop tripod can make a huge difference. If you don’t have a tripod, try bracing your elbows on a table or against your body to steady your hands.
Also, make sure your camera is focused on the right spot. Most cameras have an autofocus feature, but sometimes it focuses on the background instead of your subject.
Try tapping on the screen (if you have a smartphone) or using the manual focus feature to make sure your Sylvanian Family figure is sharp and clear. I learned this the hard way after taking about 50 shots of a little hedgehog only to realize it was all blurry!
📚 References
Wikipedia Encyclopedia
구글 검색 결과
구글 검색 결과
구글 검색 결과
구글 검색 결과
구글 검색 결과